My First Ever Blog

My name is Laura. I live with my husband Dave and our 3 girls, Morgan aged 22, Evelyn aged 11 and Robyn aged 6. I am also a registered childminder caring for children aged 0 to 11 years in our family home.

I have been interested in writing a blog for a while now, to share what we have been doing in the childminding setting, talk about activities we have tried, changes I have made and why, and most of all to share my eco journey as a parent and childminder.

Welcome to my First Ever Blog

The life of a childminder


Firstly, what is a childminder?

A childminder is a professional childcare provider offering high quality childcare from their own homes. Childminders have regular inspections from Ofsted, or their childminding agency, follow the Early Years Foundation Stage framework (EYFS), the same as other childcare settings do, such as a nursey, and regularly complete training relevant to their work including first aid and safeguarding.

Childminders are often seen as an extension to a child’s family and they can make a huge difference to children’s lives.

A little bit about me

I am a mum to 3 girls, Morgan who’s 22, Evelyn who is 11, and Robyn who is 6. I am married to Dave who also worked with me as a childminder assistant for 8 years before continuing his career in IT in 2017.

I have been a childminder for over 18 years and at first, I wasn’t sure it would be for me. I had no idea what to expect….I didn’t even know any childminders (other than the lovely lady who used to be a childminder and cared for me when I was a toddler).

I was a young single mum working in a nursery, juggling that work/family balance. When my oldest daughter was young, she would come to the nursery with me that I worked at, but as she got closer to school age, I started to wonder who was going to drop her off and pick her from school? There was no wrap around care available at the local school at the time, or from the nursery I worked at, even though it was only across the road. Friends and family had mentioned childminding to me in the past, but I was really against it as I had no idea what it involved. Sadly, there were a few issues at the nursery I worked at that really upset me and I ended up handing in my notice without even thinking about what I was going to do next. Being a single mum, I needed to earn. I needed to be able to pay the rent and put food on the table.

I knew I wanted to stay working in childcare so I made that jump and started to make enquiries about how to set up as a childminder and find out exactly what it involved. It was all a bit daunting, but it was easier than I thought it would be finding the information that I needed. I booked myself onto a childminding information evening, which luckily was local as I didn’t drive, and things weren’t available online back then like they are now. There was a lot to do but I came out of that information session thinking I could do this and decided to give it a go. It did take near 9 months to get registered with Ofsted (I don’t think it takes as long now) and set up including the application, an introduction to childminding course, first aid training, safeguarding training and an initial Ofsted visit to make sure the home was safe, and I was suitable for the role (a bit like an interview). The rest is now history.


Its not an easy job at all, especially when you have your own young children, but it is very rewarding, and I would recommend it to anyone passionate about childcare and development.


I am very fortunate to have a conservatory which I use as my play room but we also use the lounge and dining room as well as the garden. Our 3 children have grown up with my child-minding career and enjoy it just as much as I do….most of the time anyway. They do have the odd days where they just want to be alone after school and not be bothered by other children but generally, they enjoy having other children here to play and will often help me. You don’t need a huge space to be a childminder, or expensive resources. The things my  minded children play with most are the toy kitchen with a real tea set, homemade playdough, building blocks (some from scraps of wood, just sanded down to make them safe), car tyres, a plank of decking, sand and water. The main things is making the children feel safe and secure, neuturing their needs, and having an undertsanding of child development to support the children on their learning journey. You will add toys and resources along the way following the children interests eg I bought a second hand pirate ship last year as the children were interested in pirates.

We have lots of fun being, pirates, Sonic the hedgehog, Pj masks, Builders, Shop keepers, Chefs and customers, mums and dads, teachers, and more.

We look for and watch snails on the school run, then make our own using playdough. Collect blocks of wood from the playhouse, put on Hi-Vis jackets, and hard hats and pretend to be builders, using lots of vocabulary, and using pencils and a note pad, or chalk on the patio, to pretend to make a building plan.

This week I have been looking at the transition to school document. This is a nice opportunity to write about the children, who are going off to school soon, and really see how far they have come. The hardest bit is trying not to write too much! There have been a few things I have wanted to see if the children can definitely do before I add it to their report, things like number recognition, so I have followed the children’s interest that involves treasure and we have hidden numbers around the house and garden, along with some shiny treasure, for the children to find. We have then looked at the numbers and counted the treasure found.

Self Isolation Activity Ideas for Children (and their adults)


Play dough

This has to be a big favourite with all children and so easy to make. Playdough is great for hand strengthening (Important for writing. When hands become weak it becomes harder to  control pens/pencils and write)

Add Essential oils such as lavender when making the playdough or  add a herb plant to the playdough area to add a more sensory experience.


Playdough Recipe

2 cups plain flour

1/2 cup salt

1 Tablespoon cream of tartar

Mix all dry ingredients and make a well in the middle.

Add

2 Tablespoon of oil (sunflower,veg etc)

Food colouring (optional. Add to the water if using)

1 to 1 ½  cups boiling water. Mix well.  Add just 1 cup of water to begin with and add more until you get the consistency you would like. The playdough will dry out slightly as it cools so you don’t want it too dry to begin with.

Take photos using camera/tablet of your creations to add some information technology learning.


Salt trays

Exactly what it says. A tray with salt in. Use fingers, paint brushes, sticks etc to draw or write. Great for reception children when practicing their letters.


Shaving foam

A bit like the salt tray. Add to a tray for easy, fun mark making.  Add some drops of paint or food colouring and make patterns using a stick or end of a paint brush.


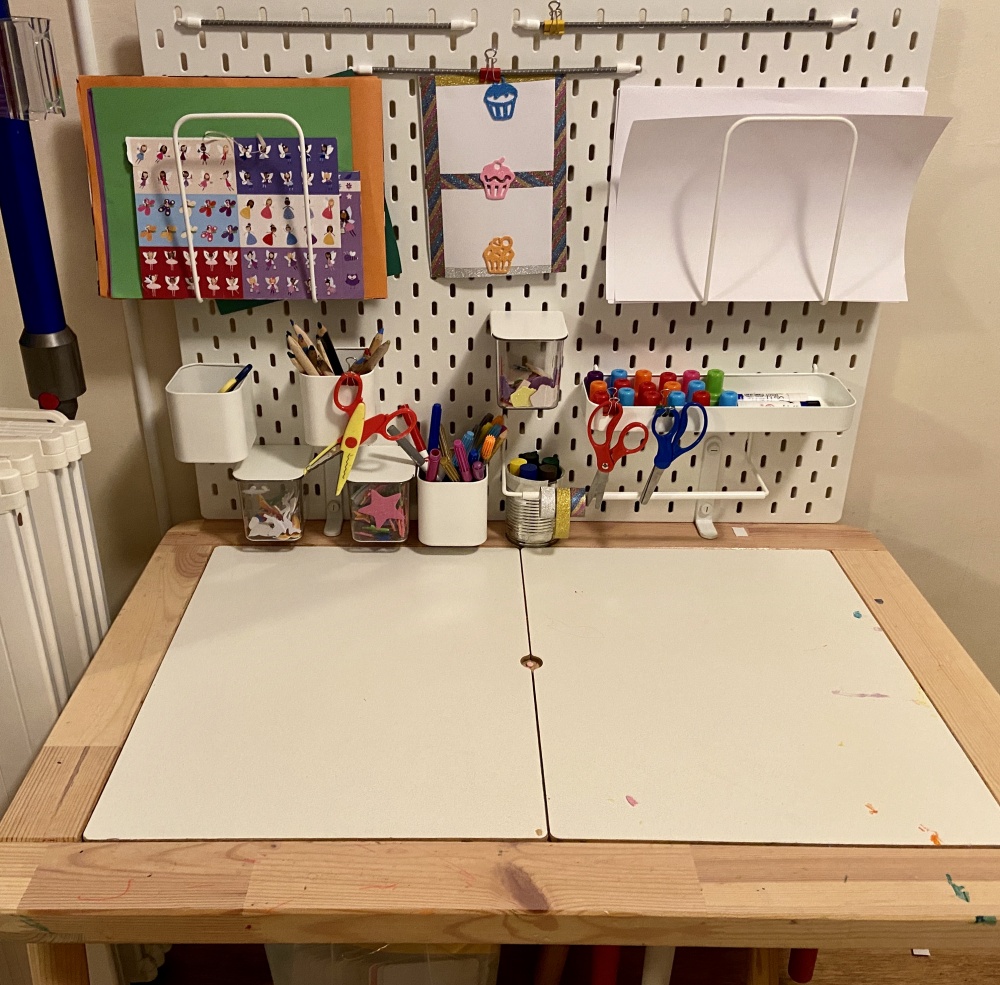
Simple paper, pens, pencils, scissors, glue etc

Let the children use it how they choose. Have it freely accessible so they can choose when and what to create or write. Cutting again will help strengthen hands.


Fortune Teller

https://youtu.be/BxyXk1sr2io


Junk modelling

Start saving empty boxes, yoghurt pots, milk carton lids, loo roll tubes etc and let the children use their imaginations to make some creations.


Painting

Who doesn’t love painting? Get some daffodils from the garden or shops and place in a bottle/vase and leave at the table with some paper and paints for the children to choose when ready. Talk about spring.


Twinkle

I’m not a fan of work sheets but I know they are used a lot in schools and some children do enjoy them. Twinkl are offering a temporary free subscription to help support home learning. Some great ideas on here using code PARENTSTWINKLHELPS

https://www.twinkl.co.uk/offer


Muddy puddle teacher

Muddy puddle teacher are also offering a temporary free subscription to help with home learning. Some great ideas here too

https://themuddypuddleteacher.co.uk/muddy-subscriptions/


Reading Eggs and Mathseeds.

This is probably one of my favourite online learning tools and they are currently offering a free 30 day trial. It has an app too. Great for ages 3+

https://readingeggs.co.uk/signup
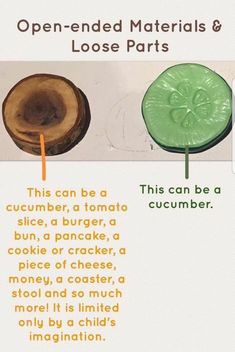
Play

Children of all ages learn a lot through play and we shouldn’t forget this.

Allow time for your child(ren) to play inside and in the garden allowing them to use their imagination.

Build a den together, read some books, create your own stories, build a train track, create a fairy / dinosaur garden with what ever you can find (mud/soil/sand/stones/plant pots/branches), build with Lego/duplo. Measure creations with a tape measure to add some maths learning or plan a creation on paper to then create using Lego.

Role play café, shops, using empty food boxes or play dough. Create menus using pictures from the internet to cut and stick or draw your own.


Paper aeroplanes

Make paper aeroplanes. Who’s can fly furthest? Measure with the tape measure.


Make and write your own book

Make a book again using pictures from the internet to cut and stick or even print some family photos to use and create a story about you. Adults can scribe (write what the child says) for the child or children can write themselves.


Pictionary

A great family favourite. If you have an easel, use it, not only will it save paper, it helps core muscle strength as children reach up to use it. Taller children can kneel to get the same effect. Use the internet to generate the items to draw (IT learning, retrieving information).


YouTube drawing tutorial

It’s inevitable that children are going to want to use technology whilst not at school, so why not let them? My school aged children love using YouTube drawing tutorials for drawing. They have created some amazing drawings doing this during the holidays. Great for pencil control and strengthening hand muscles.


Make your own tuck shop

I’ve pinched this idea from a parent so I can’t take credit for this one, but a great idea for Pre School / School aged children.

Let the children design/create a little shop area using a table or even a box. Create signs using paper and pens. Don’t forget to make a price list. You can either use real money, toy money or make your own. The children earn money throughout the day for doing jobs, school work etc and then they get to spend their money at the tuck shop.


Link to my facebook page for photos and more ideas

https://www.facebook.com/pg/Laura-Clark-Registered-Childminder-115024908616090/photos/?tab=album&album_id=556907527761157


Pre-School Inspirations 

Some great ideas on this Facebook page for pre-school and school aged children

https://www.facebook.com/1380364932188270/posts/2606270389597712/?d=n&substory_index=0


Stay safe


https://www.nhs.uk/conditions/coronavirus-covid-19/


No Toy Food. Why? 


Approx 18 months ago I read an article regarding loose parts and how they can be used instead of toy food. This got me thinking.  Do we really need toy food?  Not only is it usually plastic, so once damaged and no longer safe to use, it ends up in landfill, sitting there going nowhere and possibly polluting the soil. I did make the swap several years ago to wooden play food, and although this looked lovely when new, it soon became chipped and tired looking, loosing its appeal.  Toy food also took up a lot of valuable storage space.

I started really observing the children in their play.  What did they actually do with the toy food?

The first thing I noticed was it would often end up left on the floor. It’s main use was to fill bags and other containers, a schema that I have found many children follow at some stage in their development.  This would then often get tipped out onto the floor and left as they used the bags and other containers to fill with other items they find. The plastic food would often get accidentally trodden on resulting in it becoming squashed or cracked. The wooden toy food would gradually become chipped.

Did the children use the toy food as food? …. yes, of a sort. Quite often the food would be to big to fit more than 2 or 3  things onto a plate or in the pan so they didn’t really get used together. When I engaged in discussion, the food was one thing, a sausage, a piece of bread, a tomato. There was some roleplay by the older children using some of the toy food but the children never seemed fully engaged and were easily distracted.

I then saw this (photo to the right) https:///pin/521573200593821908/ 

It was spot on. The toy foods never represented anything else. It was never / couldn’t be combined to create something else. The children weren’t using much imagination because they didn’t need to.

So one weekend I took all the toy food away. I put this into storage to begin with, just in case, but eventually it was passed on for others to use rather than throwing it away. I have only had 1 child ask once where the toy food was. They have never asked again after I explained how they can now create their own food with anything they find. The toy kitchen has become one of their favourite areas in their play.

I have a small selection of loose parts but the one thing that gets used daily to create food/meals is the play dough. The children are creating their own food/meals, combining the different coloured or scented playdough and loose parts, asking each other or myself what we would like, or telling us what is on offer, using paper/notepads and pencil to make notes (early mark making), talking about what they are making,  engaging in creating their food/meal, linking what they make with their own experiences eg making a birthday cake using sticks as candles and singing happy birthday and making spaghetti and meatballs as that’s what they had for dinner at home the night before.

The children are so much more engaged in what they are doing, using their imagination, working together, linking ideas/thoughts, using lots of language, and most of all, having fun in their play.

Lets not forget the children who enjoyed filling bags and other containers. They still do this and it stills seems to be a common schema, but they use other resources and loose parts (offering a more varied sensory experience) instead.


Mark Making/Cutting/Craft Station – 04/02/2020

Two weeks ago we attached this notice board from Ikea to the children’s table that we already have, also from Ikea, after coming across an idea on pin interest. The pens/pencils/scissors etc have always been available to the children to use wherever they like, within reason, however, because they were in drawers, they often didn’t go self choose these items, even though the drawers were labeled with a photo.

This probably hasn’t been used as much as I thought it would but I think that is down to a change the children’s interests at the moment, however, I have found that when they need a pen/pencil or pair of scissors, they have gone to the board and found them with ease and taken it away to use in their play which is what I was hoping for.

Links:

Notice board

Table

Tray

Brackets to attach to table

Containers with lid

Paper holder

Tape/roll holder

Container

Where I got the idea from

Lets begin with my Eco Journey – 25/01/2020

Just before Christmas 2019 I became aware of how little I talk about our eco journey and the eco environment I am trying to create, not just my own family, but as a childminder as well.

When I think about my journey so far, I realise how far we have come, especially over the last year, so I thought why not share this with others? I will aim to post once a week about a change that we have made to become a more eco sustainable home and setting, along with some posts on what we have been doing in the childminding setting, any new things we have tried, or changes I have made to the setting and why.

This is where my first ever blog begins 🙂

Eco swaps – For me the biggest change / swap I have made was for my childminding business. Washable Baby Wipes.

I first attempted this swap when I was using washable nappies part time with my 3rd child, over 3 years ago. They looked expensive to buy so I decided to make my own by cutting up some fleece fabric a friend had given me, but I had no idea what I was doing and cut them too small. This resulted in them getting stuck in the washing machine filter so I quickly gave up and reverted back to disposable wipes. Fast forward 2 years to around August 2018. I think I had received an email offer from Cheeky wipes. I was chatting to a friend about it who said, if you place an order please could you get me some more and that would make the postage free. That helped give me a push to try again and that afternoon I made my first order from Cheeky Wipes and bought a basic kit consisting of 25 premium cotton terry wipes, 1 tub, 1 small wash bag and a travel spray. I already had a tub here to store used wipes if needed. They were, and still are, the best thing since sliced bread. Not only are we reducing landfill waste, they are chemical free so kinder on baby/child and my hands, and you only need one or two to clean a dirty bottom and not half a pack like with disposable wipes. They may have seemed expensive at first but considering I would go through 2 packs of disposable wipes, sometimes more, a week, I think I am already making savings.

Using the washable wipes at home was so easy, even when I had a child in a disposable nappy. Fill the tub with the wipes, soak them until they are all damp, and they are ready to go. You can buy essential oils to make them smell nice but for me this was a faff and eventually would mean another little plastic or glass bottle going into the recycling (why is this an issue? I will come to that in one of my later blogs). I have another lidded tub next to my nappy station for the dirty wipes to go into. These go in the wash on a 60 degree wash, along with any other flannels, towels, cot bedding etc that I have used or anything else that can be washed on a high wash.

Using the washable wipes when out and about took a little longer to get used to. Its okay when I have a child in a washable nappy as I can just store the wipe with the nappy in the wash bag until we got home, but when I have one in a disposable I have to make sure I have a separate bag with me to store the dirty wipes in. If I know there will be a sink near the changing area, I just take the wipes dry and wet them just before changing a nappy. If I am unsure if there will be water available, I take some wet in the little cheeky wipes waterproof storage bag that I got with my kit. The only down side to taking them wet, is you can’t leave them in your changing bag or they go smelly so I have to remember to put them in before we go out. You can buy sprays but unfortunately I don’t get on with the one I have but defiantly worth a try.

My tips

You will need 1-2 lidded tubs 1 for clean wipes and 1 for dirty wipes unless you’re only using washable nappies. Around 25-50 wipes (depending how many children’s nappies you need to change). 1-2 small waterproof wash bags, 1 for clean wipes and one for dirty wipes if child is not in washable nappies.

I bought mine from Cheeky wipes (link below) but they can be purchased from other places as well.

The wipes work best once they have been washed.

Don’t store more than 2/3 days worth of wet wipes in the tub as they will go smelly.

Tumble drying them keeps them soft but is not essential.

Don’t wash using fabric condition as this can affect how they absorb the water that you need them to soak up.

If you make your own, make sure they are around 20 x 20cm so they don’t get stuck in the washing machine filter

Linkshttps://www.cheekywipes.com/